Box tutorial and variations
One of the new sections in the Ideas Book is for Big Shot Die Cutting products. This is an amazing cutting and embossing system! I can't decide which is my favourite accessory: the vintage wallpaper embossing folder is gorgeous and I love all the diffeent things you can create with the scallop envelope die. One thing is for certain, I have a few things on my wish list! Good new for those of you who already have a Cuttlebug, is that nearly all the dies and folders work in that machine too. Call or email me if you want to check which are compatible.
While I prioritise my wish list I have worked out the directions for making a box similar to the Box #2 using my trusty Fiskars trimmer and a bone folder. Of course if you prefer it can also be cranked out in a flash using the Bigz xl die and Big Shot. (page 155 in the catalogue)
You will need:
A4 cardstock
co-ordinating designer paper and ribbon
trimmer
Bone folder
Sticky strip or mono glue
Cardstock, stamps and ink to decorate.

Start with a sheet of A4 and trim to 6 3/4 x 8 inches. With the 6 3/4 inch edge along the top guide, score at 1 1/2 inches from each edge. Turn 90 degrees and score at 2 inches: 3 1/2 inches: 5 1/2 inches: 7 inches. Burnish all score lines (dashed lines) with bone folder.

Cut where marked (solid lines). Remove the shaded areas.


Decorate, fill with treats, add ribbon and a tag and you have a perfect gift package.


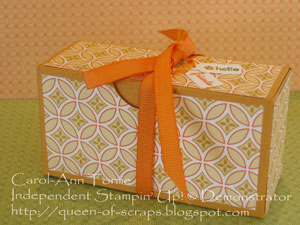
In my finished box at the top of this post I used panels of designer series paper (retired Haiku) and Pumpkin Pie 1/4 inch grosgrain ribbon with More Mustard cardstock. I added Tiny Tags stamps and the jewellery punch with Tangerine Tango, More Mustard and Old Olive markers.
Check back tomorrow and I will have some variations to share with you using this box as a base.


Comments